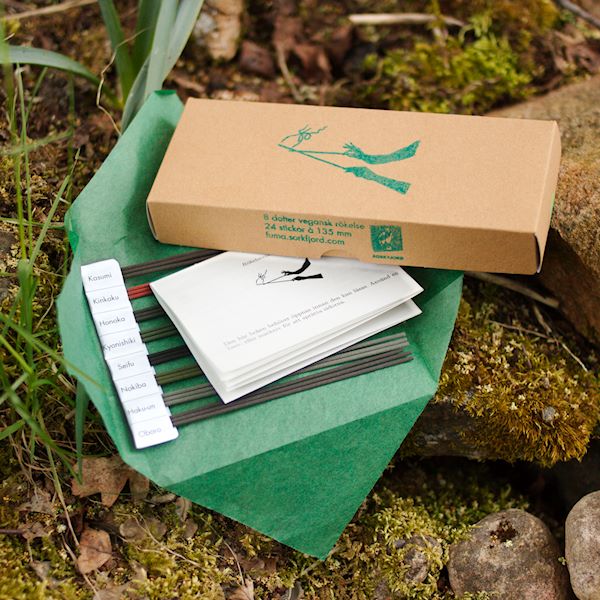
In this article I will introduce a method to make a 16 page unopened booklet in A7 format from a laser jet duplex printed A4 sheet using open source software (Latex and Psutils) on Linux. The booklet will contain an introduction to Japanese incense and be included in Sorkfjord Fuma’s new incense assortment box Rökelsesökaren.
I’m at present developing a new incense assortment box for Swedish premium incense retailer and distributor Sorkfjord Fuma. Sorkfjord Fuma sells Japanese high quality incense, specializing in smaller packages and the customers often have limited experience with Japanese incense.
The included folder will give the customer an introduction to the Sorkfjord assortment of incenses as well as add value to the box.
Presumptions
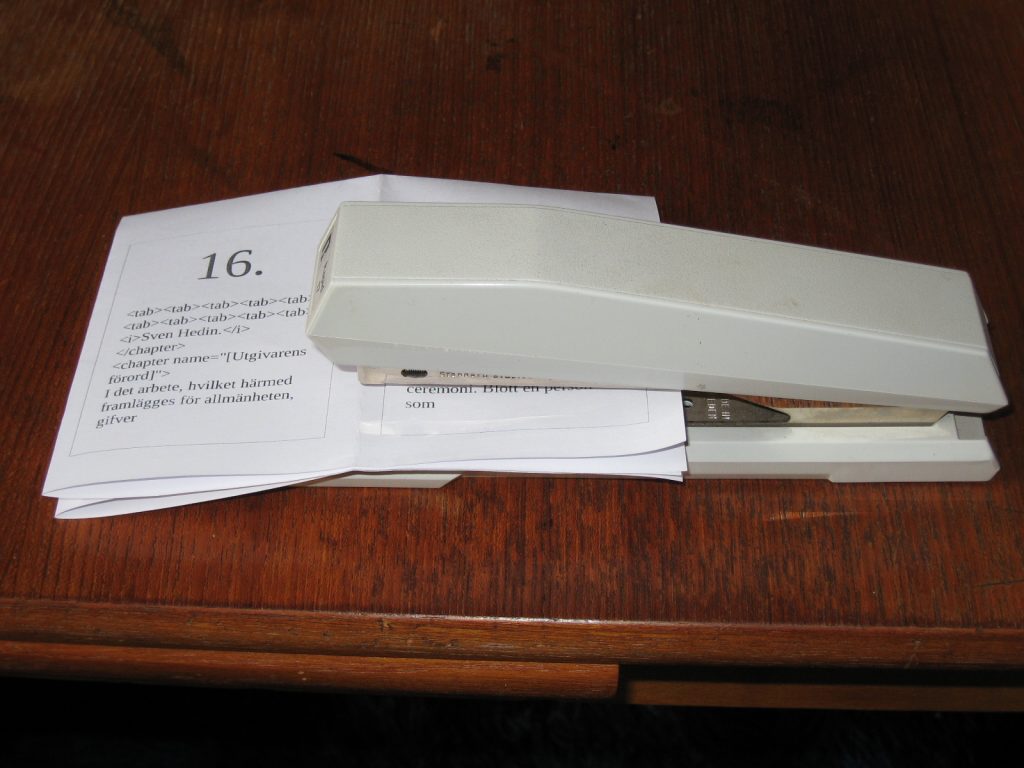
The folder has to be possible to print on demand on a regular laser jet printer (at present the HP Laserjet 1320n). There might be many versions of the folder, and it will often be updated, thus it is very important that the whole typesetting process is streamlined and fast – it has to be easy to make changes to the text and then print the new version. The folder will be stapled with a regular hand office stapler. That is possible since the folded booklet is very small (A7 format, 74×105 mm), so it is no problem for an office stapler (which usually has a reach of about 100 mm) to reach the 74 mm needed.
The paper used will be Munken Pure 80 g/m2. The sheets have been custom cut to A4 from larger sheets. Since the A4 paper will be folded in half an odd number of times (three times) to form the A7 booklet, the fibre direction of the original A4 sheet should ideally be along its short edge (opposed to how the fibres are orientated in a regular copier paper). Since the sheet is folded an odd number of times, the fibre orientation of the A7 will be opposed to that of the A4.
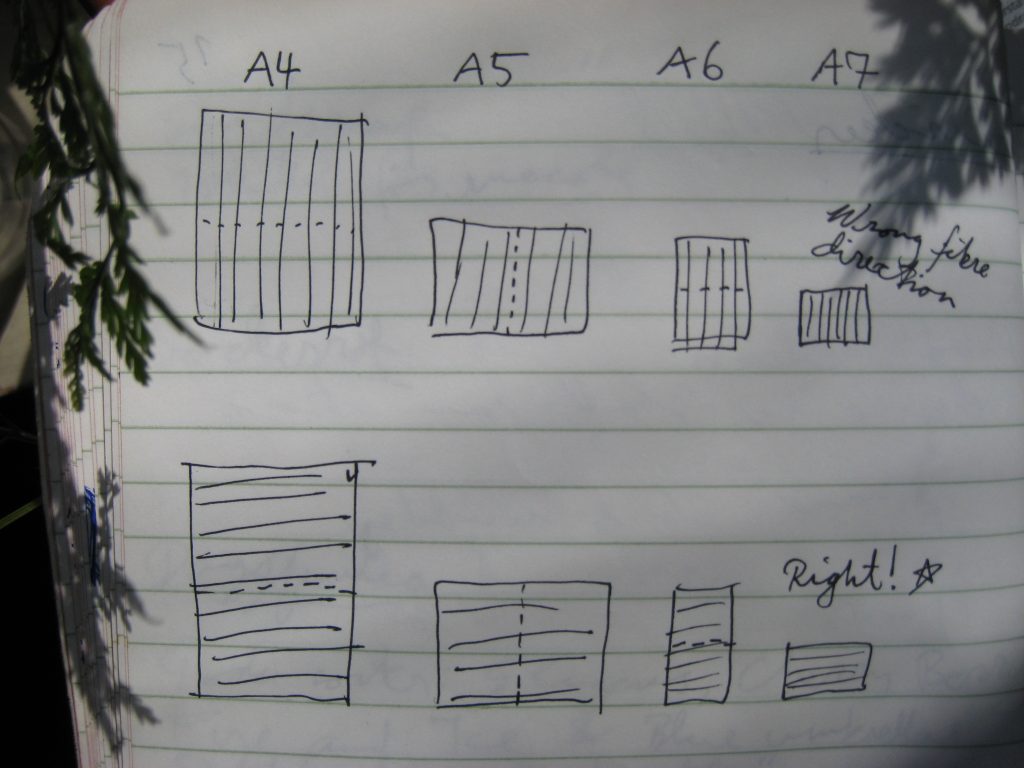
Using a sheet with the fibres in the wrong direction will result in a booklet that is harder to flip, and the pages will also curl up easily along the long edge, which is ugly.
Typesetting with Latex
I will use Latex to typeset the booklet for a couple of reasons:
-
- I already know how to use it, and I don’t want to spend time learning new software.
- I am happy to go with the standard font et cetera, I do not want too many choices.
- Latex is very good at typesetting text.
- I want to use this booklet template for a long time, and Latex always stays the same.
- It is free and I will always be able to get it.
I will use the memoir class, because it has good functions for changing the layout of the document.
Since the booklet is so small, I decided to layout the pages in landscape orientation to get longer rows. Here’s a basic template for the layout I will use:
% Tell Texworks which program to compile in.

% !TeX program = pdflatex
% Use "onesided" because we want minimum printer margins on every side.

\documentclass[9pt,onesided]{memoir}
% Set the paper size.

\setstocksize{74mm}{105mm}

% Set size of final publication pages to same as paper size.

\settrimmedsize{\stockheight}{\stockwidth}{*}
% Set header and footer space to zero since we won't use them (to save space).

\setheadfoot{0mm}{0mm}
% Set left and right margins to printers minimum margins.

\setlrmarginsandblock{6.35mm}{6.35mm}{*}

% Ditto for upper and lower margins.

\setulmarginsandblock{12,7mm}{12,7mm}{*}
% Check that the layout is sensible and implement it

\checkandfixthelayout
% Since our booklet will be in Swedish.

\usepackage[swedish]{babel}

\usepackage[T1]{fontenc}

% Use UTF-8

\usepackage[utf8]{inputenc}

% Lorem ipsum package only for use in this demo.

\usepackage{blindtext}
\begin{document}
% Set the number of leaves per gathering to 8 (16 pages). This will tell Latex you prefer 16 pages, and if it can't fit your text onto them it will output blank pages so that the gatherings will be even.
% https://tex.stackexchange.com/questions/431847/how-to-tell-latex-the-preferred-number-of-pages-of-the-finished-document

leavespergathering{8}
% No page numbering to save space.

\pagestyle{empty}
\section*{Sorkfjord Fuma}
% Output some Lorem ipsum ...

\blindtext[18]
\end{document}

Preprint
Imposing is the act of doing imposition – putting many pages of text on the same sheet to be able to later fold them and bind them into a book. In our case we will put 16 A7 pages onto the back and front side of a A4 sheet.
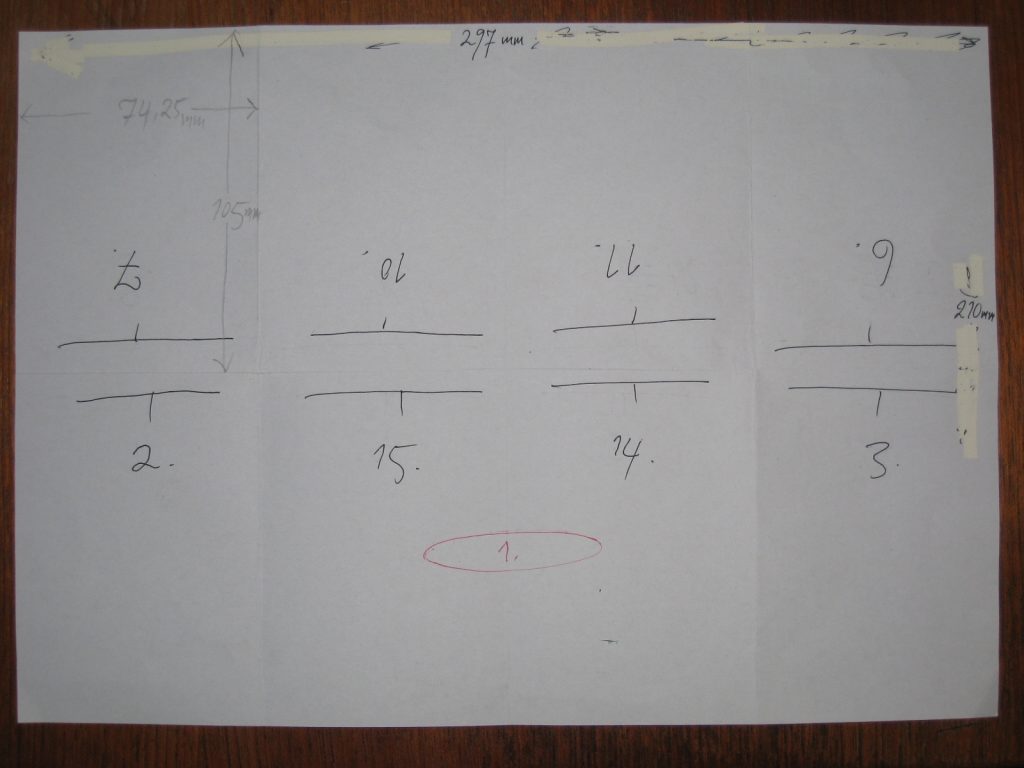
In the end the sheet will look like below.
We will use Pstops from Psutils for making the imposition. Psutils is a suite of utilities for reorganizing pages in Post Script (PS) files. On most Linux systems it can be installed with the package manager.
Converting the PDF original to Post Script
Since our original is in PDF format we first need to convert it to PS. Normally I would simply suggest to use pdftops:
$ pdftops input.pdf
But unfortunately this yields some problems. In the later step of imposting the pages all of the pages that contains images will be rendered as raster images. I have no idea why this happens.
I also tried using pdf2psbut that causes another problem: Sometimes
pstopswill not handle the imposition correctly with files generated by pdf2ps. Fortunately I found a workaround by cross-converting using both applications:
pdftops input.pdf /tmp/input-pdftops.ps

ps2pdf /tmp/input-pdftops.ps /tmp/input-ps2pdf.pdf

pdf2ps /tmp/input-ps2pdf.pdf input.ps
We now have a PS file calledinput.ps. Converting between PDF and PS is usually lossless.
Imposing with Pstops
Pstops is very useful when it comes to complicated reorganization of the pages in a Post Script file. However it takes some work to understand how to use it, especially since the documentation does not contain more than a few examples. The manual is short and concise, but a little bit too technical for my taste. I will explain the usage of Pstops by breaking down the command that is used to do the imposition of the booklet.
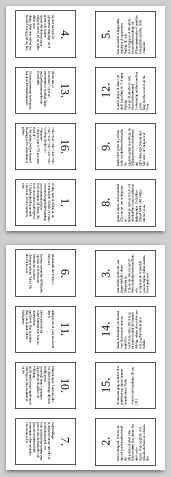
To make the process more understandable I’m using an example file with large page numbers and a border around each page.
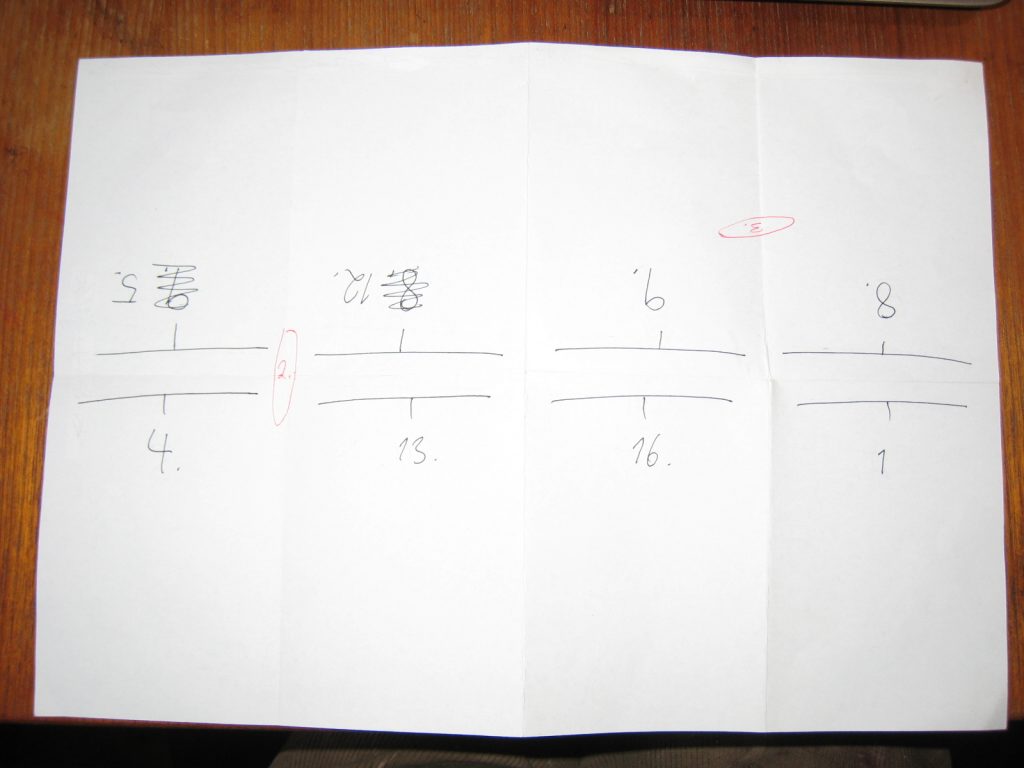
We will start out by putting every one of the 16 pages of the booklet on the correct side of the A4 sheet. Numbers in parenthesis are the page’s position within the modulo (see explanation below).
Front side:
1  (0)

16 (15)

13 (12)

4  (3)

8  (7)

9  (8)

12 (11)

5 (4)
Back side:
3  (2)

14 (13)

15 (14)

2  (1)

6  (5)

11 (10)

10 (9)

7  (6)
The pages are placed on the respective page with this command:
$ pstops -pa4 '16:0+15+12+3+7+8+11+4,2+13+14+1+5+10+9+6' input.ps output.ps
The -p switch sets the output paper format. -pa4 means set output paper format to A4 (default).
Our booklet only has 16 pages and consists of one signature (one folded sheet), but other books will have many signatures. To make our finished command work even for a file that has more than 16 pages, Pstops uses something called modulo. Modulo is a block of pages that will be reorganized in a specified fashion. In our booklet there is only one modulo (one folded A4 sheet) consisting of 16 pages. But if our booklet had been 32 pages long, there would have needed to be 2 modulo since each A4 sheet can only hold 16 A7 pages. We specify the size of the modulo with 16:.
After the deciding the size of the modulo we will now work with the pages of the modulo (the 16 pages of the booklet). Inside the command they will be called pagenos and be numbered starting from 0 up to 15.
We start by listing the pages we want on the first page: 0+15+12+3+7+8+11+4. Since these numbers are separated by a plus sign they will all be on the same page. Then we add a comma to tell Pstops we want a new page, and after that we specify the pages we want on the second page: 2+13+14+1+5+10+9+6.
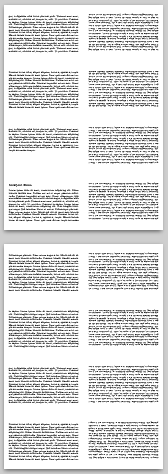
The resulting PS file will have two A4 pages and look like this:
The pages of the original PS are now placed on the correct page, but on top of each other. In the next step we will rearrange them and put them in their right position. All coordinates will be relative to the position they have now, in the lower left corner. That is where the coordinates in PS start.
Let us now remove all but one page to make it easier to understand our example:
$ pstops -pa4 '16:0' input.ps output.ps
That command will put page one of the booklet (page zero of the modulo) on a A4 page like this:
Now, let’s try altering the position of page one one the A4 sheet. Pstops has three commands for transforming:
L Rotate page 90° to the left
R Rotate page 90° to the right
U Rotate page 180°
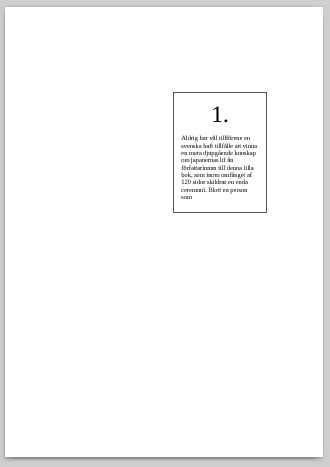
The page can be repositioned by adding offset values, for example like this:
$ pstops -pa4 '16:0(0.5w,0.5h)' input.ps output.ps
The offset values follows the pageno (page number in modulo), in this case 16. The standard unit for offsets are PS points but can be followed by cm or in to take centimetres or inches respectively. But now we use w and h so we can specify the offset relative to the size of the A4 sheet. In our case the command will move the pageno half (0.5) a page (A4) width to the right and half a page height upwards:
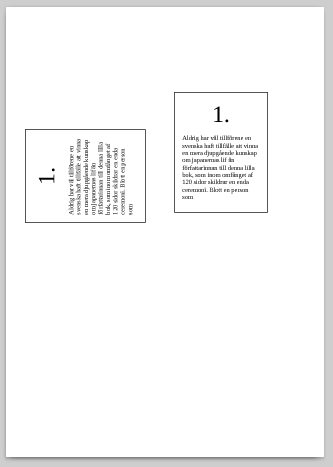
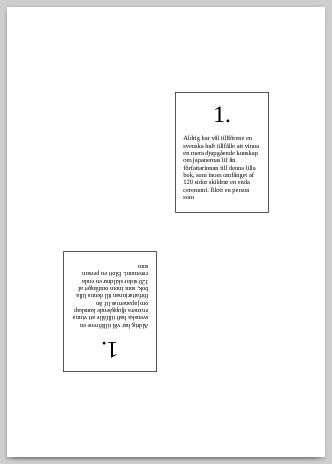
We can now try turning the page with the L,R and U transformation commands. In the examples below pageno zero (page one of the booklet) appears two times on the page, one with transformation (L, R or U) and one without for clarity:
$ pstops -pa4 '16:0(0.5w,0.5h)+0L(0.5w,0.5h)' input.ps output.ps
$ pstops -pa4 '16:0(0.5w,0.5h)+0R(0.5w,0.5h)' input.ps output.ps
Note that the pagenos are turned around their lower left corner.
$ pstops -pa4 '16:0(0.5w,0.5h)+0U(0.5w,0.5h)' input.ps output.ps
Let us now bring back all pagenos we placed at the two pages earlier:
$ pstops -pa4 '16:0+15+12+3+7+8+11+4,2+13+14+1+5+10+9+6' input.ps output.ps
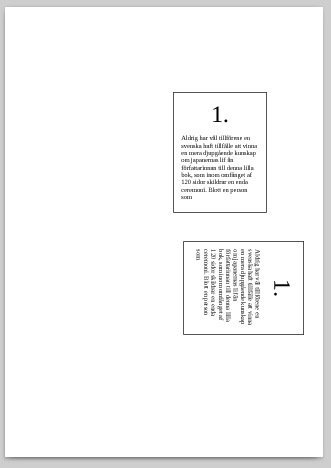
We can now start position the pagenos on the page. We look at the imposition dummy we made earlier and write commands that places the pagenos accordingly. Pageno 0 (page 1) should be turned to the right (which will move it out of the page, out of view) and should then be moved up by one forth of the height of the A4 page:
pstops -pa4 '16:0R(0,0.25h)+15+12+3+7+8+11+4,2+13+14+1+5+10+9+6' input.ps output.ps

We then continue writing commands that places the other 16 pagenos in the correct position according to the imposition dummy. To make it easier it is highly recommended to open a terminal windows and a document viewer on the same screen so that changes to the command can be seen directly. The document viewer Evince included in XFCE4 will auto update if the PS file is changed.
Keep in mind that there are two ways of turning the paper when doing duplex printing (this also apply if you don’t have a duplex printer and will turn the pages by hand and then feed it into the printer again. The sheets can be turned either around the long side (this is standard, since this is how you usually turn A4 pages in for example a binder, when you look at it in portrait orientation) or around the short side (often called “flip” in printer settings).
The finished command will look like this if the page is turned around the short edge:
pstops -pa4 '16:0R(0,0.25h)+15R(0,0.5h)+12R(0,0.75h)+3R(0,1h)+7L(1w,0)+8L(1w,0.25h)+11L(1w,0.5h)+4L(1w,0.75h),2L(1w,0.75h)+13L(1w,0.5h)+14L(1w,0.25h)+1L(1w,0)+5R(0,1h)+10R(0,0.75h)+9R(0,0.5h)+6R(0,0.25h)' input.ps output.ps
Or if we start out with a A7 document with landscape orientation, like the Latex template above, it will look like this. Page should be turned around the short edge when printing the backside.
pstops -pa4 '16:0(0,0)+15(0,0.25h)+12(0w,0.5h)+3(0,0.75h)+7U(1w,0.25h)+8U(1w,0.5h)+11U(1w,0.75h)+4U(1w,1h),6+9(0,0.25h)+10(0,0.5h)+5(0,0.75h)+1U(1w,0.25h)+14U(1w,0.5h)+13U(1w,0.75h)+2U(1w,1h)' input.ps output.ps
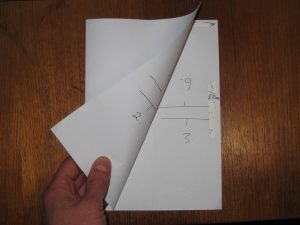
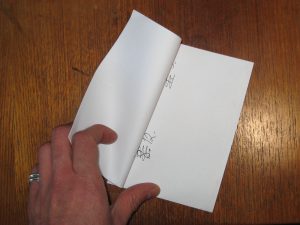
Now we just have to fold the printed sheet three times:
Staple it:
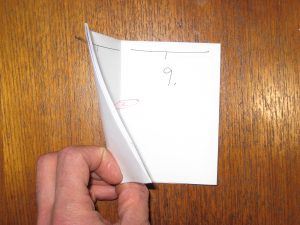
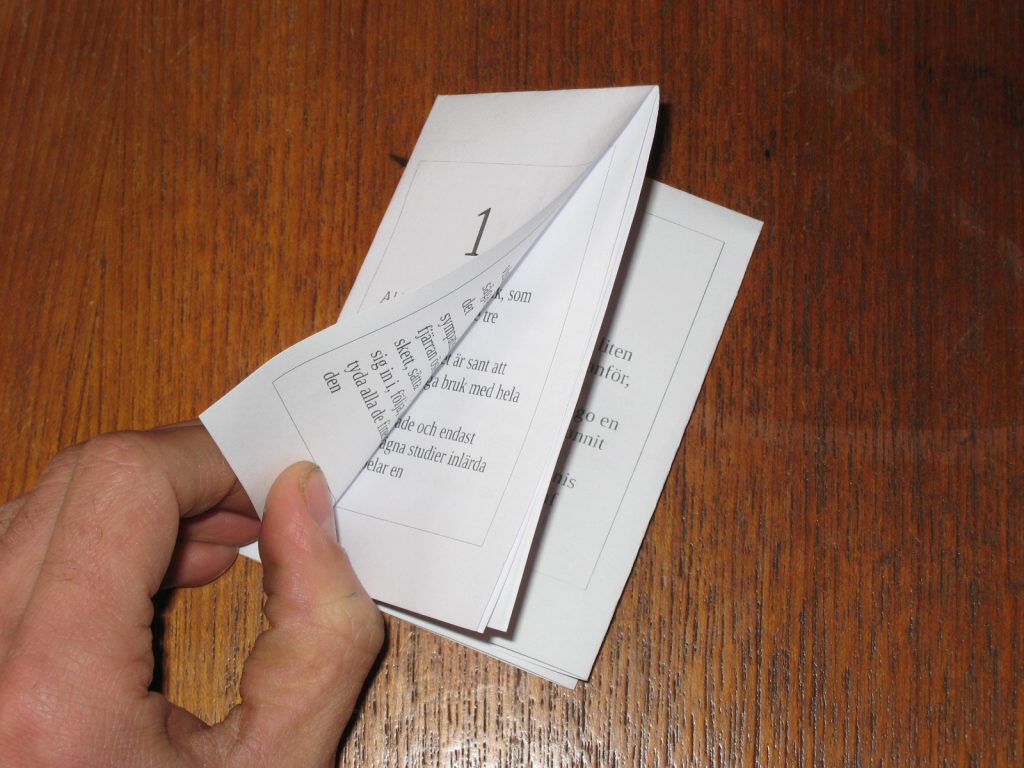
And our booklet is done! To be able to read it we have to open it of course:
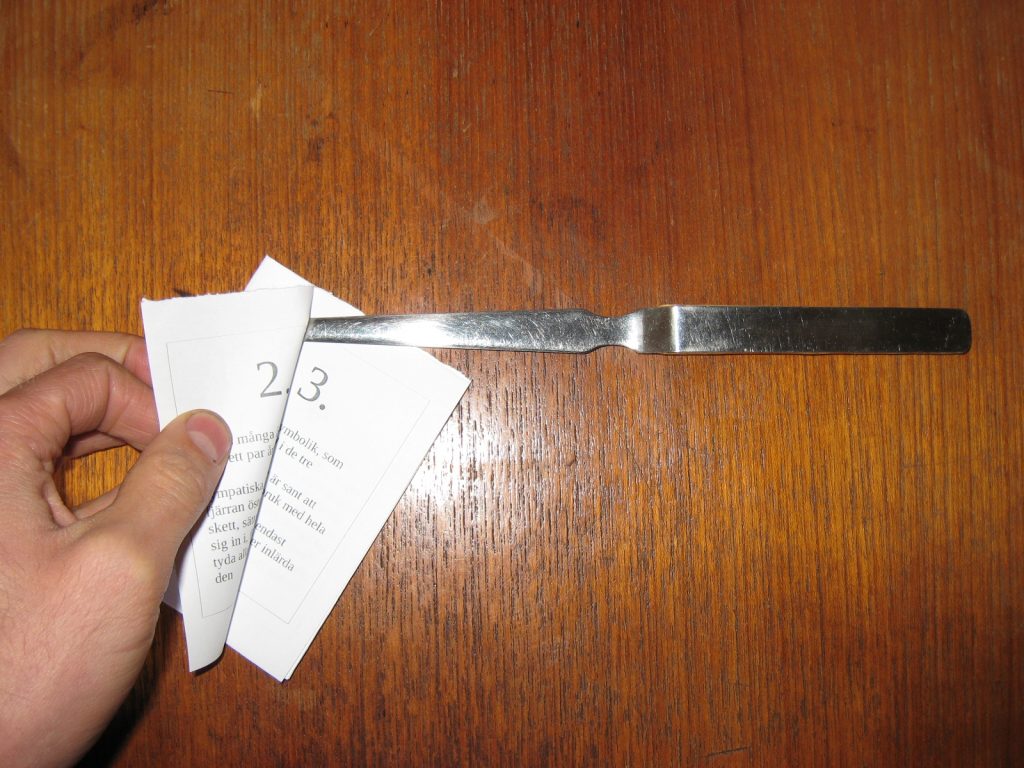
Opening the booklet is best done one sheet at a time to not risk tearing. Opening should not be done with a sharp knife, since that will result in an ugly, zigzag cut. A sharp knife will also easily stick in between the pages and might also damage other parts of the page. Use a letter opener or paper knife instead. If you don’t have that, an non-serrated food knife is the second best choice.
Example bash script for the whole process
To make the process simpler you can use a bash script something like this:
#!/bin/bash

input="$1"
# Note: Print the resulting pdf with duplex along the *short edge*
# Crossconverting workaround to not rasterize pages with images
pdftops $input /tmp/$input-pdftops.ps
ps2pdf /tmp/$input-pdftops.ps /tmp/$input-ps2pdf.pdf
pdf2ps /tmp/$input-ps2pdf.pdf /tmp/$input-pdf2ps.ps
# Do the imposting
pstops -pa4 '16:0(0,0)+15(0,0.25h)+12(0w,0.5h)+3(0,0.75h)+7U(1w,0.25h)+8U(1w,0.5h)+11U(1w,0.75h)+4U(1w,1h),6+9(0,0.25h)+10(0,0.5h)+5(0,0.75h)+1U(1w,0.25h)+14U(1w,0.5h)+13U(1w,0.75h)+2U(1w,1h)' /tmp/$input-pdf2ps.ps "${input%.*}"-imposition.ps
# Remove tempfiles
rm /tmp/$input-pdftops.ps
rm /tmp/$input-ps2pdf.pdf
rm /tmp/$input-pdf2ps.ps
Printing
Since the A4 sheet used in production of this folder has the fibres along its short edge, it is not as stiff along the long edge as regular copier A4 sheets (which has the fibres along their long side). This means that there, at least in the HP Laserjet 1320n will be some problem with curling and resulting paper jam if one doesn’t take precautions.
I earlier used custom cut A4 sheets with the fibres along the short edge to make a publication in A5 format, and printing it was always a mess since the sheets would come out of the printer all curled up and sometimes creased. A lot of the paper was wasted. Not least the printing was then done on a non-duplex HP Laserjet 1200 …
When doing some tests for the Sorkfjord Fuma booklet I had almost given up on printing the folders on a A4 printer. I started to look into the possibility to instead print them in a A3 printer where the sheets could be turned in their stiffer direction. As a last resort I searched the web for a solution to the problem, and got a clue that I might be able to change something in the driver. There are (at least on Linux, which I’m on) many differentprinter drivers compatible with the 1320n. Some of them have more options than others. I was using a driver with very few options, but remembered I had seen options for different types of media in another driver. I installed a driver with more options and did a test run with “Media type” set to “Thin (<70 g)”. It worked! Even in duplex.
Changing the media type in the driver changes the temperature at which the fuser assembly operates and the speed at which the paper passes it. The fuser works with temperatures up to over 400°C, so it is not hard to imagine that it can cause a thin paper to crease if not calibrated accordingly.